How to Make Custom Scoreboard for PES 2013
Tutorial about Making Custom Scoreboard for PES 2013. Including: Required Files, Introductions, Mounting, Editing, UV Maps, DPOW Animation & File Maps
how do they work.
Spring 2013 www.mediafire.com/?be89ckkw4kueren
Winter 2012 www.mediafire.com/?hc9v9hanhbbw827
Summer 2013 www.mediafire.com/?bko0bne4q2oil77
Required Files
Latest Version Kitserver: Click here
Ultimate Data Explorer : Click here
Tutorial for Scoreboard: 


Introduction
PES keeps it’s graphics and scripting within .bin files, which are then mounted within .img archives by PES.
Basically, what we need to do, is create our own bin files, and then use kitserver to inject them into PES in place of the default. Kinda similar to how it does with kits. Except, in some ways, easier for us. You’ll see what I mean later.
Firstly, we need to correctly set up the mount point within kitserver. For this tutorial, I have supplied a scoreboard I cobbled together when working this all out for myself. It’ll help illustrate where everything lives. I’ll explain how to mount it correctly, and once that’s working, we can get onto the actual editing.
Throughout our adventures, we’re going to be tackling two different file types:
.tex
Graphics files. Contain the user interface, and our first port of call. Can be exported to png with UDE, edited externally, then reimported. UDE will automatically convert the png back into tex.
.obj
DPOW animation files. Contains the scripting that tells PES how to use the above graphics, such as where to overlay logos and strings like team names. Absolute-fucking-nightmare to work with, since they are compiled scripts and cannot be uncompiled. Best we can do is poke about them with a HEX editor. They hurt my head.
Mounting
Open the custom scoreboard supplied above. Within it are 13 bin files, containing all the different elements of the scoreboard for mounting.
Once you have kitserver set up correctly, navigate to:
kitserver13/example-root/img/dt06.img/
Here is where we put the bin files we want to inject into PES. Note you just create a folder called dt06.img, it isn’t a file. Copy all the bin files supplied into here.
Fire up PES and start a match. You should now have a my Winter Cup themed scoreboard.

Test it out, make sure everything works properly before proceeding.
Editing
So we have these bin files, but what use are they. All the juicy graphics files are locked away inside, so we need the PES Ultimate Data Explorer to edit them.
Download UDE from the link provided above, and fire it up.
Take a look through the 5 tabs at the top. The DPOW and Image Editors are the main points of interest for us.
Make yourself at home, you’re gonna be spending a lot of time here.
Hit Open in the top left and navigate to those bin files you extracted in the previous section. Open unnamed_292.bin.
With that, we now get a list of all the files within the bin down at the bottom:
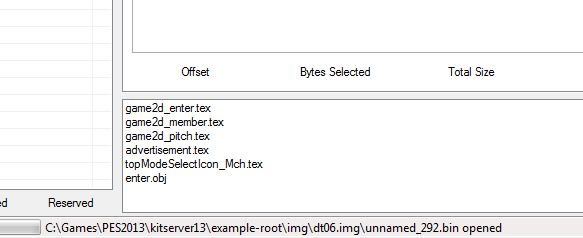
Let’s take a closer look at these files. Click on game2d_enter.tex. UDE will automatically switch the the Image Editor.
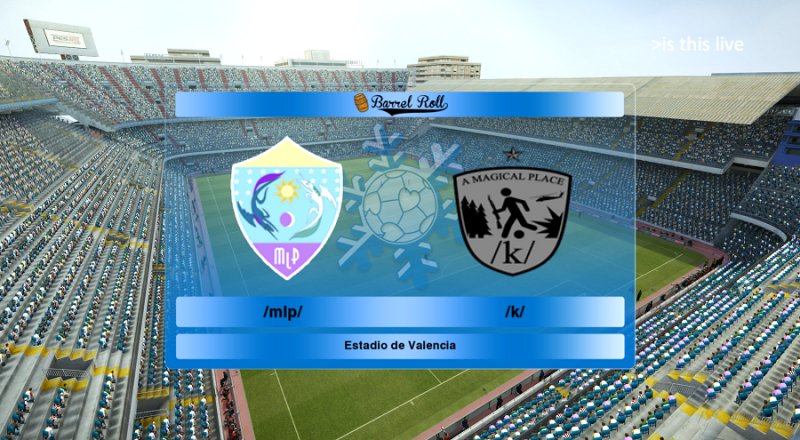
Displayed is the raw graphic for the entry splash, shown in the previous section.
We want to export this and have a play, so click Save as PNG-32 and save it somewhere.

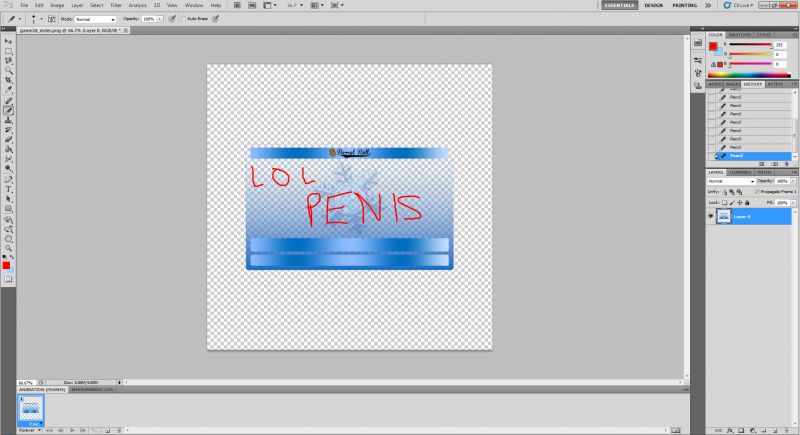
Open the new png in your image editor of choice Photoshop.
You can now edit the image to your heart’s content. Use the existing one as a template for where the logos and text will be overlayed within PES, or whatever. I dunno, is this not why you came here?
Save your creation as PNG-32. No, not indexed or anything, just standard. Told you these were easier than kits.
So now we have our shiny new entry splash, we need to reimport it into the bin. In UDE, first make sure you still have game2d_enter.tex selected at the bottom, and then hit the Open PNG button.
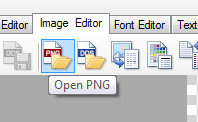
The new image will display.
Great. Except you haven’t actually imported it yet. Hit the Replace Image button to overwrite the selected image in the bin – game2d_enter.tex.

Now it’s imported. To finish things off, hit Save up in the top left.
All done.
Fire up PES, and enjoy your new creation.

Congrats, you just made a custom scoreboard. Well, part of one.
This export-edit-import procedure is the fundamental part of making a scoreboard. Once you nail it down, you’re golden. It applies to every other graphic in the entire game.
Use the UDE to look at the other graphics in that bin. Go poke about the other bin files I provided. You’ll find all the other graphics the scoreboard uses. Edit these to your hearts content. The world is your oyster.
UV Maps
If you’ve poked about the bin file some, you’ll notice that not all the graphics work the same way. Some are full screen images, and some are a collection of various smaller graphics.

The latter are called UV Maps. Instead of the DPOW calling the entire image, it uses only a small, defined area (you’ll see this in action in the DPOW section). It can be a bit confusing, but actually makes things easier. Substantially less images for us to work with.
The primary UV map we’ll be working with is game2d_01, in unnamed_294.bin. This contains all the in-match graphics, such as the score ticker and TV logo.
The graphics should be fairly self-explanatory, but in the bottom right of the image there are two points of interest to us.
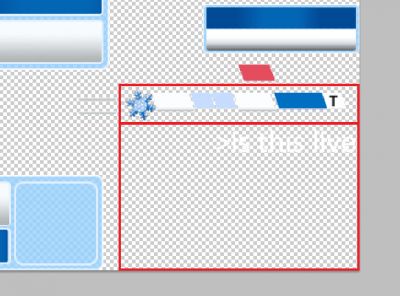
Here we have the in-game score ticker and TV logo. There is an area defined by a DPOW file that includes this graphic, so keep your edits within reasonable proximity to the existing one, or it’ll be clipped out in-game.
Besides these, we also have the scoreboard at the bottom of the graphic, popups for goalscorers, substitutes, bookings, etc. Everything that shows up in the middle of matches. You’ll probably spend a long time here.
DPOW Animation
So changing the graphics is all well and good, but what about the overlay? How to I change where PES places the text and logos ingame?
For this, we need to edit the obj files within the bins.
As stated previously, obj are compiled DPOW scripts that we cannot uncompile – we cannot open them externally. We can only edit their raw data with a HEX editor. Although UDE does a great job of parsing the files, it is still very basic and not very well documented. I’ll try my best, but bare with me, this is at the limit of my current understanding.
Let’s take a look at enter.obj within the unnamed_292.bin. UDE will automatically switch to the DPOW editor.
There are two tabs within the DPOW editor – UV Map and 3D Object. The former helps illustrate how a graphic is being used, and the latter illustrates where that graphic is placed on the screen within PES. Well, it tries to. It’s a bit wonky and prone to going off the screen, but we’ll work with it.
On the right side of UDE we now have the DPOW editing pane. Here, with enter.obj selected, we can search through the ‘Blocks’ of data within the obj. Each Block corresponds to a screen within PES. Since there are literally hundreds of blocks, we can also Filter through the data for specific points of interest.
Let’s start with one of the starting splashes. Say the player listing this time.
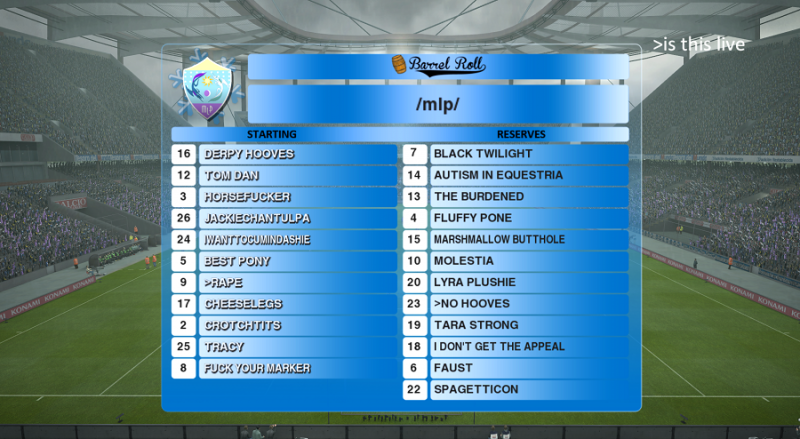
We could use the filter to narrow down our search through the blocks, but I’m going to cheat and tell you it’s
Block 14. Switch to that.
Below it, two textures have popped up – Texture0 and Texture1. Click on Texture0.

Below again, we see this texture is game2d_member. Which should sound familiar.
Below it again is the UV Map co-ordinates. Here you can set the defined area that was explained in the UV Map section. These are is illustrated in the central pane of UDE if you have the UV Map tab selected. In this case, since the entire image is used, the entire box is red.

For contrast, switch to Texture1 – game2d_01 in this block.
The UV Map area is now reduced to a rectangle the bottom right corner – which, in game2d_01, if you recall from the UV Map section, is the TV Logo. You can change the co-ordinates to alter this area if you want to.

Now switch to the 3D Object tab.
Here we have a box in the top right. This is an illustration of where that graphic is used in game. In this case, the TV logo is in the top right. Comp_game2d_01_3D_ingame.png

Strings and icons
These are simply the text and logos that PES overlays on our graphics in game. Here, we can alter the position of both, as well as the colour of the text font.
Now, conventional wisdom tells us that all text in the game are strings.
Sadly, this is not the case.
Let’s find the data block that has the player names for the player list at the start of a match. SPOILER: It’s block 18.

The strings box now lists 25 strings of text. Click on one, and it will display it’s position in the 3D Object tab.
Well, it should.
For whatever reason, it’s way up, off the screen. You can’t pan or zoom to it, but trust me, it’s there. Cycle through all the strings and eventually you’ll get to one that clips back into view. Told you it was wonky.
Below the strings box, we have the controls for that string.
Text Align is, obviously, the alignment of the text within the string box. 24 is left, 25 is centre and 26 is right.
Colour is again self explanatory. So far, the only colours I’ve found are white (3 or 20) and black (4 or 25). With simple experimentation here we could make a map of all the colours at some point.
Transp is the transparency of the string. 255 is completely opaque, so presumably 0 is completely transparent.
Offset is similar to Offset for graphics, it allows you to adjust it’s position on the screen.
W and H are the width and height of the string box.
Sz I’m not sure on. Font size perhaps?
Finally Active simply switches the string on or off, just like the textures.
So we have 25 strings, presumably for 25 players on the team, right? Ha ha, no! That would be far too obvious.
Strings1-12 are actually the player numbers, and 13-25 are their names. So that’s only 12. Where’s the rest of the team?
Also, String0 is an unused ‘substitutes’ title. worry.jpg
Turns out, these strings are just the player names on substitues bench. The starting eleven are displayed as logos.
Welcome to the limit of my knowledge.
Below the strings we have the icons section. And I have no idea how these work.
Switch to block 19 and we’ll be presented with a list of icons. Eleven to be precise – one for each team member on the field.
![]()
We have very limited options here. We can alter the transparency, offset, width and height, but that’s about it. We cannot change the font of these player names, they’re obviously dealt with somewhere else.
So, for the time being, we’re stuck with the default white with black shadow font. I really hope we get to the bottom of this soon, it’s pissing me off.
File Map
There are 13 bin files used by the scoreboard, and each one contains a variety of files you can edit. Through my adventures I’ve complied a map of what files each bin contains, and what they do. Most should be pretty self-explanatory just from looking at them.
unnamed_292.bin
game2d_enter.tex
game2d_member.tex
game2d_pitch.tex
advertisement.tex
topModeSelectIcon_Mch.tex
enter.obj – Scripting for the UI before the match starts (Team logos, players, formation)
unnamed_294.bin
game2d_01.tex – Collection of graphics shown during the match, including the score ticker at the top.
game2d_02.tex
unnamed_297.bin
game2d_00.tex – Various icons shown during the match
unnamed_298.bin
advertisement.tex
game_01.obj – Scripting for the graphics shown during matches
unnamed_300.bin
pk_score.obj – Scripting for the penalty shootout scoreboard
unnamed_302.bin
replay_arrow.tex
replay.obj – Scripting for replays
unnamed_303.bin
replay.tex – Icons for the replay toolbar
unnamed_1045.bin
chTr2d.obj – Scripting for the bottom scoreboard when teams score (I think)
unnamed_1056.bin
chTr_resultdialog.tex
unnamed_1081.bin
game2d_01.tex – Seems to be a copy of the default version of the one in unnamed_294.bin
result_stats.obj – Scripting for the match stats screen
result_gp.obj – Scripting for the player stats screen
unnamed_1083.bin
advertisement.tex
game2d_result.tex – Graphic for the match and player stats screen
result_window.obj – More scripting for the stats screens
unnamed_1437.bin
trans_ex_pes.tex – Replay splash
trans_ex_pesEff.tex
trans_ex_pes.obj – Scripting for the replay splash
unnamed_1437.bin
trans_ex_pes.tex – Replay splash
trans_ex_pesEff.tex
trans_ex_pes.obj – Scripting for the replay splash

Hello friend, you still have the video tutorial? It is that the link is down.
Hello friend, you still have the video tutorial? It is that the link is down.